
In this article:
Before starting
Importing is the fastest way to add multiple contacts simultaneously. Before proceeding, we invite you to take a look at our guide. It will help you prepare your import file. You will find, among other things, the file types and data formats supported, as well as tips and advice.
How to import a contact list
STEP-BY-STEP
Discover in this short video tutorial how quick and easy it is to import a list of contacts.
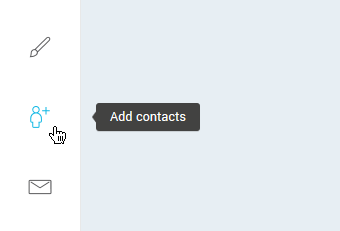
- Click the Add contacts icon from the quick access menu on the side bar.
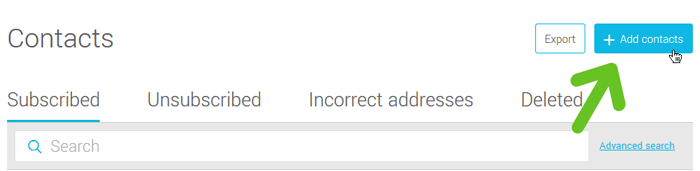
Or go to menu and click the Add contacts button.
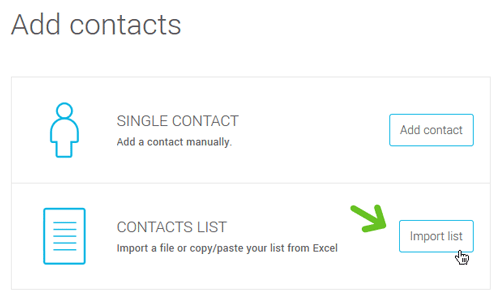
- Under Contact list, click Import list.
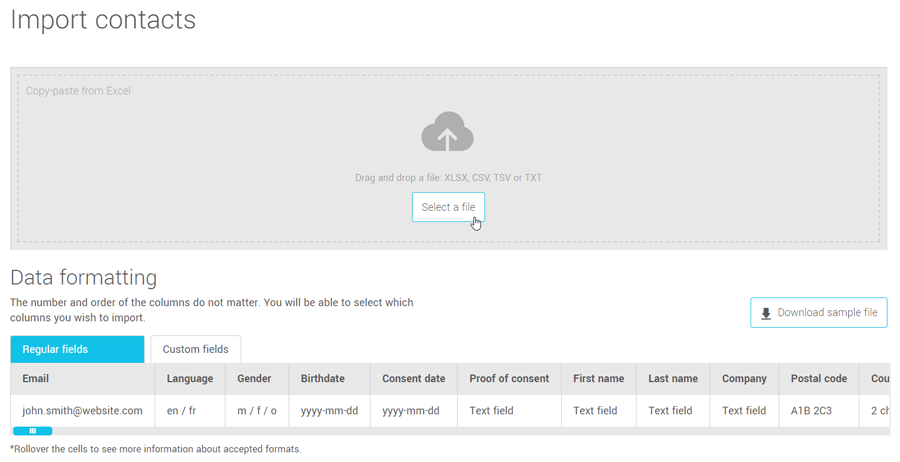
- Select the contacts to import. You can either add your subscribers from a file (XLSX, CSV, TSV, or TXT) or copy and paste your data.
The maximum size allowed for importing is 250 MB, regardless of the method used.
Choose or drag an drop a file
Click the Select a file button to browse your folders and select your file. Or from your PC file system, drag and drop your document directly into the boxed area.
Copy and paste method
Open your spreadsheet file, select the data you want to import and copy it. Back in your account, click on the top left of the boxed area, then paste your information using the keyboard shortcut (Windows: CTRL + V or Mac: CMD + V) or use the paste option in your browser's contextual menu.
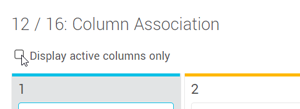
- In the next step, choose the columns whose information you want to import.
Use the switch at the bottom of each column to turn it on or off. Move from left to right to see all the columns detected. Note that inactive columns will be ignored when importing your data.
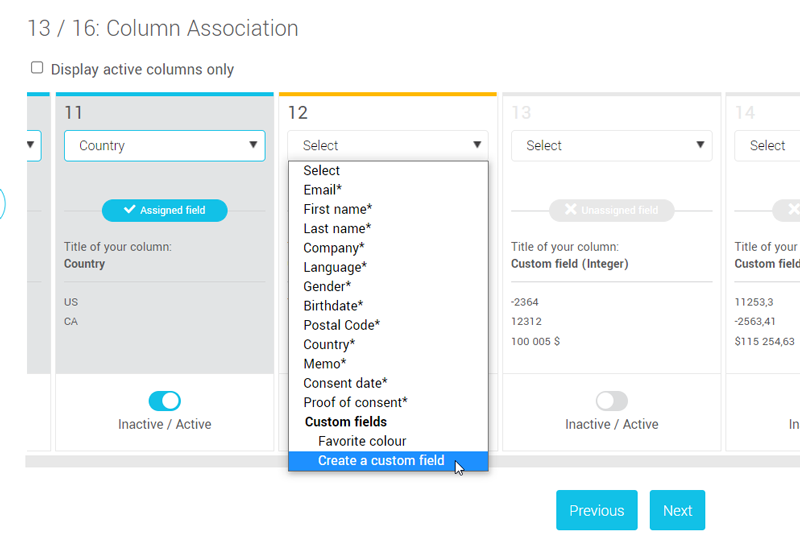
- Then check to see if each active column is assigned to the correct field. Open the drop-down list at the top of the column to modify or complete the missing information.
If all your fields have been used or don't match the content of a column, you can create a custom field for this information. To do so, select the Create a custom field option in the field drop-down menu. Depending on your plan, you can create up to 40 custom fields. Learn more >
- Click Next to continue.
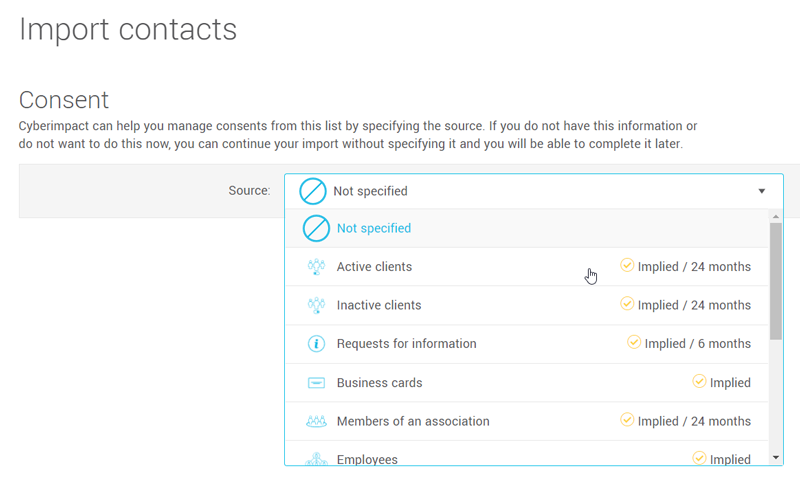
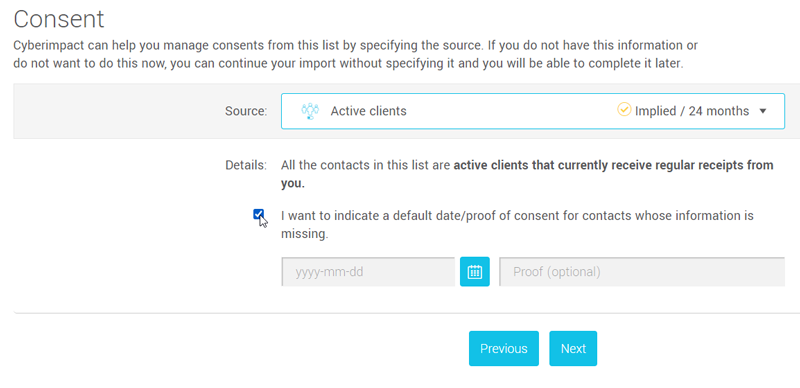
- Choose a consent source for your list of contacts.
If this information is unknown or you simply don’t wish to complete this step right away, choose the Not Specified source to go forward with your importation. It’s possible to come back later and update your contacts' consent source.
The consent source is how you obtained your contacts' consent and it defines whether you have implied or express consent with them. Depending on your choice, the system will automatically add the necessary information related to the Canadian Anti-Spam Legislation (CASL) for each contact on your list. If you have added a consent date for your contacts, this will also allow you to take advantage of powerful tools to help you manage efficiently your contacts' consent, such as the automatic calculation of the expiration date of implied consents. Learn more >
- Write down, if applicable, a default consent date and proof for the contacts in your list who may not have one.
To do so, check the box I want to indicate a default date / proof of consent... and enter the appropriate information.
This can be particularly useful when your contacts share a consent date and proof. You won't have to add this information into your import file. For example, you had a booth at a trade show and participants filled paper coupons to sign up for your newsletter. The default consent date could, in this specific scenario, be the date of the event and the default proof could be something like "Coupon for the newsletter subscription, filled during the _NAME_OF_YOUR_EVENT_". Don’t forget to preciously keep your entry forms!
- Click Next.
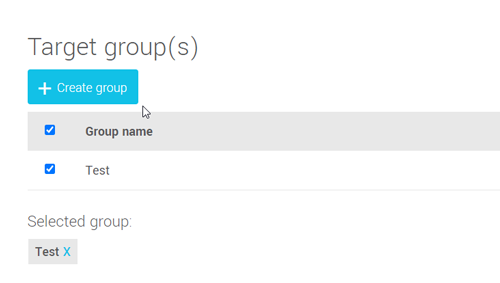
- Select in which group(s) to add your contacts.
If the group in which you wish to add the contacts doesn’t exist yet, you’ll be able to create it at this step. Simply click the Create group button. Name your group and click OK. Your newly created group will be automatically selected for the importation.
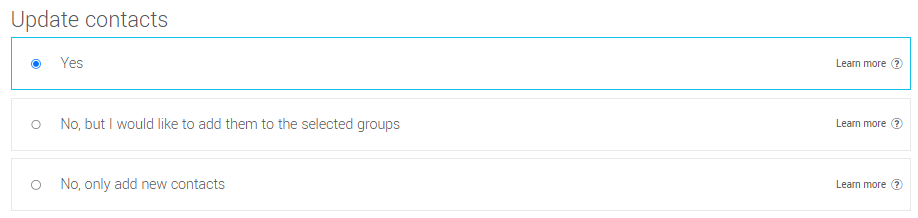
- Select an option regarding the update of existing contacts. Click Learn more on the right of the choices to get more details on the different actions. If it is your first import, leave the choice to Yes.
What is considered an existing contact ?
- Click the Import button to start the process. You can continue working during your importation.
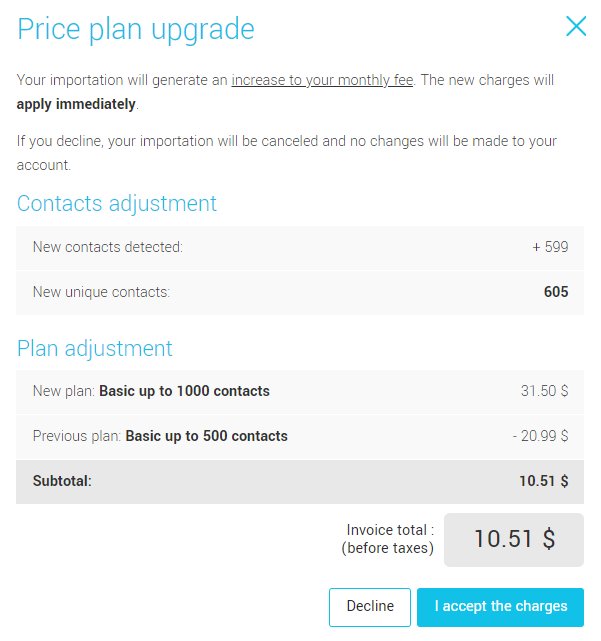
- Choose a plan or accept the fee, if required, to proceed.
Free plan limit
The limit of contacts for the Free plan is 250. If you try to add more, you will be asked to choose a paid plan.
.png)
Exceeding the contact level
When the number of new contacts added causes your current contact level to be exceeded, a message will appear on your screen with the following details: the number of new contacts added, the new contact level reached, its monthly price and the difference to be paid. If you accept the fee, the import will continue as scheduled. If you refuse, your import will simply be canceled.
- When the import is complete, review the importation report and check your groups.
Before finishing
When the import is completed, a report will be displayed on your screen. You will be able to see the result of your import. Take the time to review it.
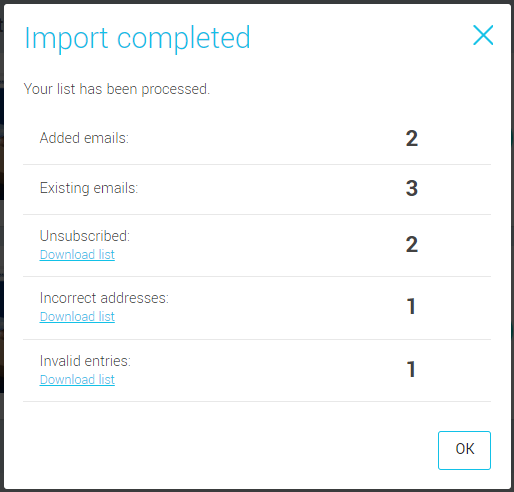
- Added emails: This is the number of new subscribers that have been created. These addresses did not exist in your account before the import. They have been added to the selected group(s).
- Existing emails: this is the number of emails that are recognized as already being part of your account's subscriber list. If you chose the No, only add new contacts option in the question about updating existing contacts, these addresses were ignored during the import, otherwise they were added to the selected groups. If they were already in those groups, they won't be added a second time.
- Unsubscribed: This is the number of email addresses that are recognized as already being on your account's unsubscribed list. Click the Download list link in the report to see them. These addresses are blocked during import to prevent you from mistakenly writing back to an unsubscribed contact. Learn how to resubscribe an unsubscribed contact >
- Incorrect addresses: this is the number of email addresses that are already detected as being part of your account's incorrect address list. This means that you have already tried to write to this address and that we received a permanent error message, also called hard bounce, when we tried to deliver the email. We therefore advise you to validate these email addresses. Click on the Download list link in the report to see them. Like unsubscribers, these addresses are also ignored during import, they won't be added to your groups. Learn more about incorrect addresses >
- Invalid lines: Pay special attention to invalid lines, as these are contacts that could not be imported. They are often due to the fact that the required format of a field was not respected (for example, wrong date format: DD/mm/yyyy instead of yyyy-mm-DD), to a syntax problem of the email address (for example, the @ is missing) or to its absence (the email address is mandatory). Click on the Download list link to see them and find out why they failed to be imported. If necessary, correct these lines and re-import them. Get tips on how to correct invalid lines >
Frequently asked questions about importing a contact list
- What types of files can I use to import my contact list?
- Are there any formats to be respected when importing data?
- Do I have to include a line including the title of my columns at the start of my file?
- How to segment my contacts before my importation?
- What do I need to know about importation and my contacts consent?
- What do you mean by "Existing contact"?
- Can there be duplicates in my contacts, groups, mailings or invoice?
- Can I reactivate an unsubscribed or incorrect address by mistake?
- Why are some of my groups missing in the groups I can choose from in the importation process?
- The total of contacts added to my group after the importation is lower than the number of contacts I have in my file…why?
- All my lines are invalid! What do I do?
- What to do when an error occurs during the import process?
- Why is my list denied?
What types of files can I use to import my contact list?
Your contacts need to be in one of the following file formats:
- XLSX or any other table software
- CSV (Comma-Separated Values)
- TSV (Tab Separated Values)
- TXT (text file)
You’ll find help to export your contacts from your email software by clicking here.
Are there any formats to be respected when importing data?
Yes, some fields such as gender, language, dates and some custom field types have specific formats that must be respected. Check out our guide to prepare your contacts for import >
Do I need a title line in my import file?
Although it is not necessary to insert a title line in your file, it could greatly speed up the import process, especially during the column association step. If the column has the same title as the field, our system will recognize the information and make the association automatically.
How to segment my contacts before importing them?
There are quite a lot of ways you can segment your contacts. Some clients like to segment their contacts by their language, interests, location, consent source, etc. Keep in mind the contacts in your file will be added to the selected group(s) during your importation. These groups will then be used to send out your mailings. Mailings sent to a well-segmented list will always yield better results.
What do I need to know about importation and my contacts consent?
During the import process, you will be prompted to select a consent source for all contacts in your file. This information indicates how you obtained their consent and allows us to determine whether their consent was implied or express.
To easily select a consent source that is appropriate for all the contacts on your list, segment them by relationship type. For example, collect your active clients in one file, your submission requests in another... Add in your file a column with your contacts' consent date (e.g.: for active customers, it would be the date of their last purchase, for your prospects, it would be the date they send their information request) and one with their consent proof. The consent date is a valuable piece of information since it allows us to calculate for you, depending on the consent source chosen, the expiration of your implied consents.
If the contacts in your file come from different sources or if you don't have gather all their consent data at the time of import and you prefer not to fill in this information right away, you can select the Mixed list or Not specified source. It will be possible later to update this information. In the meantime, they will be identified as having implied consent. To update their consent, all you have to do is re-import the list with the correct information.
Téléchargez notre Guide PDF sur l'importation et le consentement de vos contacts >
What do you mean by Existing contact?
An existing contact is simply a contact that is already part of your subscribed contacts.
It can mean:
- A contact already in the group(s) selected during the importation process;
- A contact already in another group then the group(s) selected during the importation process;
- A contact already in your subscribed contacts list that wasn’t part of a group (ungrouped contact).
Can there be duplicates in my contacts, groups, mailings or invoice?
Contact management
The answer is no. There simply can’t be more than one contact for the same email address. There will never be a duplicate in your subscribed contacts (see menu > Subscribed tab), so fear not. It’s, however, possible for a contact to be associated to more than one group. That's why if we add up the total contacts of each group, the result may well exceed the total of Subscribed contact in groups (see menu > Subscribed tab > Grouped number (between the brackets)).
Groups management
If a contact is already in the group selected for the import, your contact won’t be added a second time. Information in the contact details will be updated if the appropriate update option was selected during the importation process (option 1 at the Update contacts step).
If a contact isn’t part of the group selected during the importation process but already belongs to other groups in your account, his email address will be added to the selected group and will remain in the group he was previously associated to.
If, however, you choose to only import new contacts (third option at the Update contacts step of the importation process), contacts that are recognized as existing contacts will be ignored and won’t be added to the group selected during the importation process. If they already belonged to the selected group, they will remain in it.
Mailing management
When you schedule a mailing and select more than one group, the system will check the list of recipients to ensure that each of them receives only one email. So, if you have subscribers who are part of more than one of the groups selected for the mailing, there is no need to worry, they won't receive a duplicate email.
Invoicing management
Each email address, and therefore each contact, counts only once in your billing, even if they are part of more than one group. You can therefore freely segment your contacts without fear of your invoice blowing up.
Can I reactivate an unsubscribed or incorrect address by mistake?
No, it is not possible to reactivate these types of contacts by importing them. Our import system recognizes these addresses and ignores them during import. However, you can view the list of contacts detected as unsubscribed or with incorrect addresses by clicking on the Download list link in the import report.
Learn how to subscribe again a contact who previously unsubscribed >
Learn more about incorrect addresses >
Why are some of my groups missing in the groups I can choose from in the importation process?
Dynamic groups can’t be selected during import as it’s not possible to manually add contacts to this type of group. To be added to a dynamic group, your contacts must simply match the group criteria. It’s possible to import contacts without specifying groups. After their import is finished, if they meet the criteria of dynamic groups, they will be automatically added to them.
The total of contacts added to my group after the importation is lower than the number of contacts I have in my file…why?
A few reasons can explain why the numbers in your file and in your group can differ:
- There were duplicate addresses in your file.
If an already existing contact is found twice in your import list, it counts as two in the total shown in the Existing emails section of the importation report. However, it will not be added twice in the selected groups, as the system automatically eliminates duplicates. Learn more about how we handle duplicates >
- Some contacts in your file were already part of the group specified for your import. The system will therefore not add them a second time.
- If you chose to import only new contacts (at the Update contacts import step), the system will ignore email addresses that were already part of your account's subscribers.
- Is it possible that some rows may be hidden in your Excel spreadsheet? If so, it was possible that they weren't copied and pasted with the rest of your data in the importation process.
- Were there addresses recognized as incorrect or unsubscribed in your importation report? Were there invalid lines? Pay close attention to your importation report, addresses identified as incorrect or unsubscribed will not be added to your groups. Invalid lines are entries from your file we were unable to import for various reasons. Click here to learn how to resolve problems pertaining to invalid lines.
- If you have selected an Excel file to import, only the data from the first spreadsheet will be imported.
All my lines are invalid! What do I do?
Invalid lines are contacts that couldn't be imported. They are often due to the fact that the required format of a field was not followed (e.g., wrong date format: DD/mm/yyyy rather than yyyy-mm-DD), a syntax problem with the email address (e.g., the @ is missing) or its absence (the email address is mandatory).
When this happens, start by clicking on the Download list link under the Invalid lines section in your importation report. A file will open to help you target and diagnose the problems.
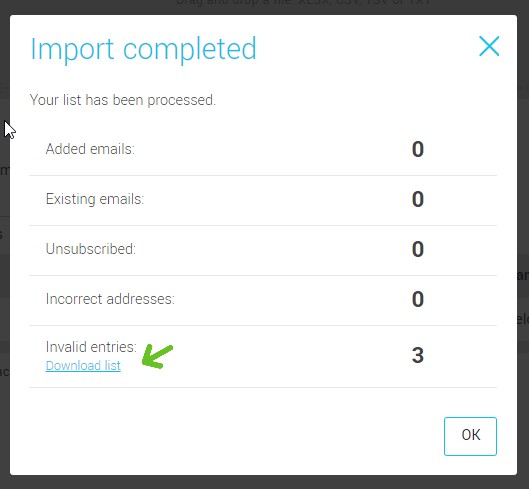
In this file, you will find:
- the number of the row where to find the entry in your original import file;
- the reason why the entry was rejected;
- all the information contained in the different columns of this line.
If necessary, correct these lines and import them again. Get more tips on how to correct invalid lines >
What to do when an error occurs during the import process?
If you have an error message, this might be because their was a problem with your import file.
- If you used an Excel file, check for line breaks within table cells and remove them. Keep your file and it's formatting as simple as possible.
- If you have copied and pasted a large area in your Excel sheet, try to only select the lines and columns where there are data to import. Sometimes, certain columns and rows can seem to be empty, but they contains invisible information.
- It is possible that you are working from a corrupted file. Try transferring your data to a new file and saving it under a new name.
If it still doesn't work, don't hesitate to contact our team for assistance.
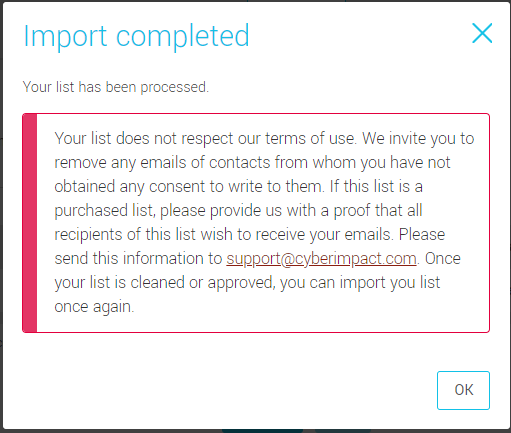
Why is my list denied?
If you see this message, it means that your list has been detected as problematic according to our security criteria. We invite you to review your list, validate your contacts' addresses and make sure you have their consent.
SEE ALSO: