
To comply with Law 25 and give your visitors real control over their cookie preferences, it is recommended to integrate a consent banner on your landing pages.
You have three options:
The Axeptio banner
The Axeptio banner offers great flexibility and allows centralized consent management for multiple services, such as Google Analytics, Meta Pixel, and many others.
It includes a ready-to-use generic template available in both French and English, making it easy to quickly deploy on your websites and landing pages.
The banner can be activated directly from your landing page editor. Simply log in to your Axeptio account to use your existing setup and manage your texts, styles, and list of cookies.
Customization is fully possible from your Axeptio account, providing a clear and compliant consent experience that meets privacy requirements.
The free version of Axeptio is limited to 10,000 views per month, which may be sufficient for many websites or landing pages with moderate traffic.
Learn more about the Axeptio banner >
The Cyberimpact banner
The Cyberimpact banner is built directly into the platform, meaning there’s no need to use a third-party tool to display a consent message on your landing pages.
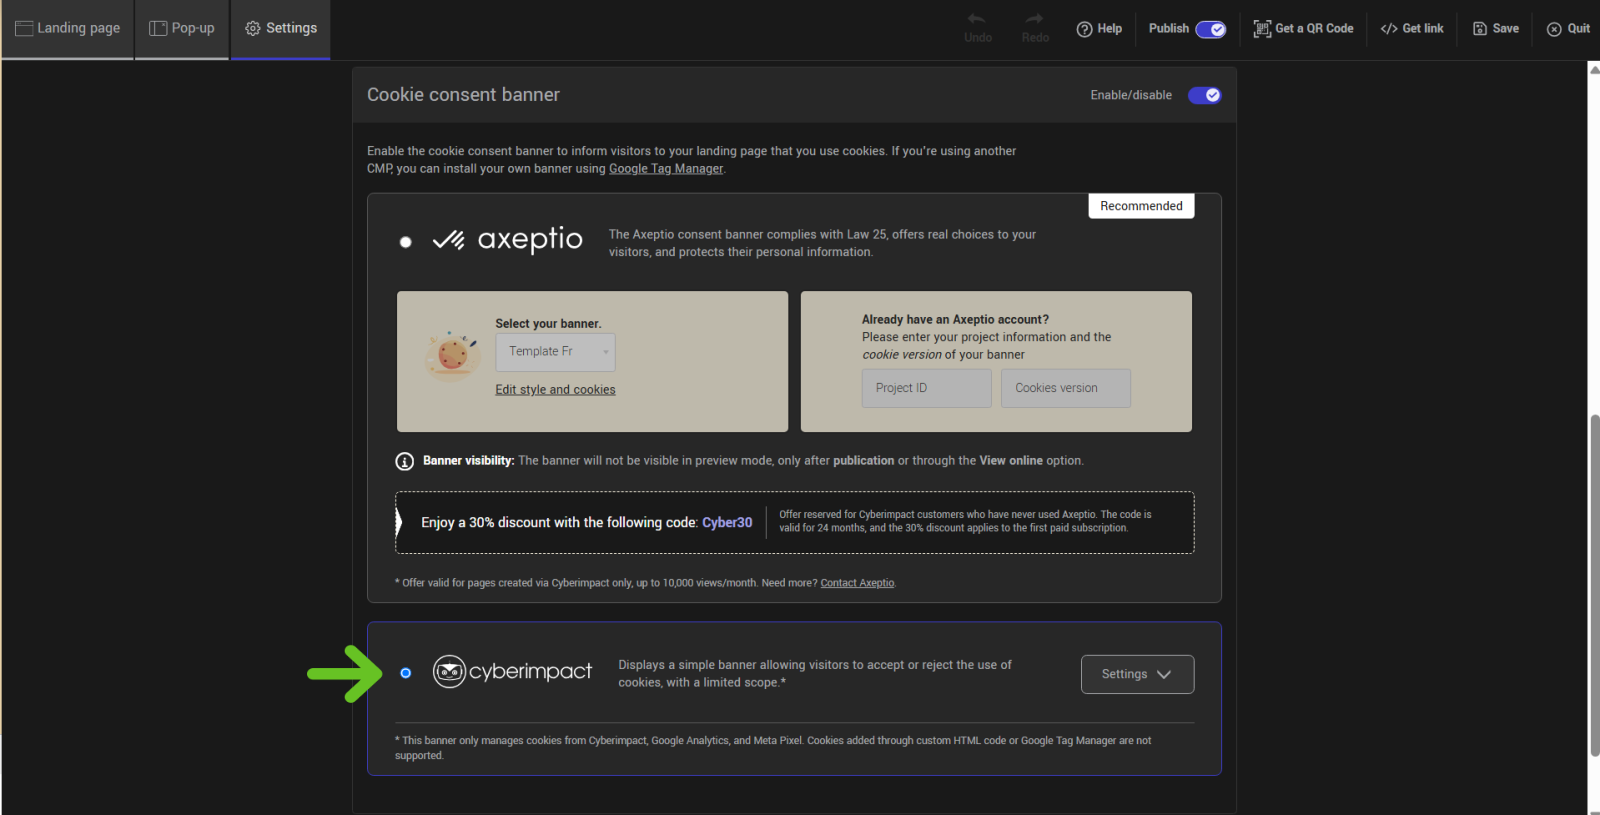
Activation is simple and quick — in just a few clicks, the banner can be displayed to inform your visitors and collect their consent regarding the cookies used by Cyberimpact, such as for forms and page statistics.
Please note that the banner does not manage cookies coming from external tools or scripts added to your pages, such as integrations via an HTML block or Google Tag Manager (GTM).
It only applies to cookies generated by Cyberimpact.
If your pages use other tracking technologies, you will need to ensure their compliance yourself.
To activate and customize it:
- In the Landing Page section, open the action menu of the desired page, then click Edit.
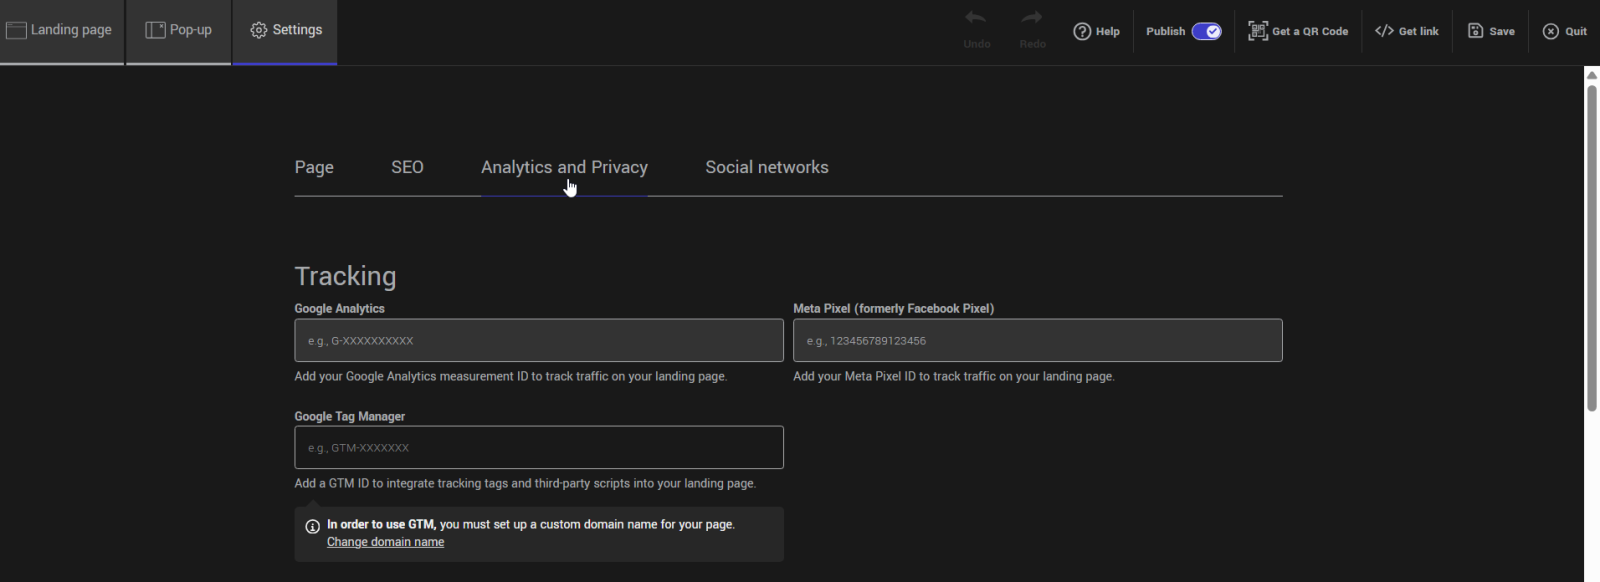
- Select the Settings tab, then the sub-tab Analytics and privacy.
- Check the Cyberimpact option.
- Open the banner settings.
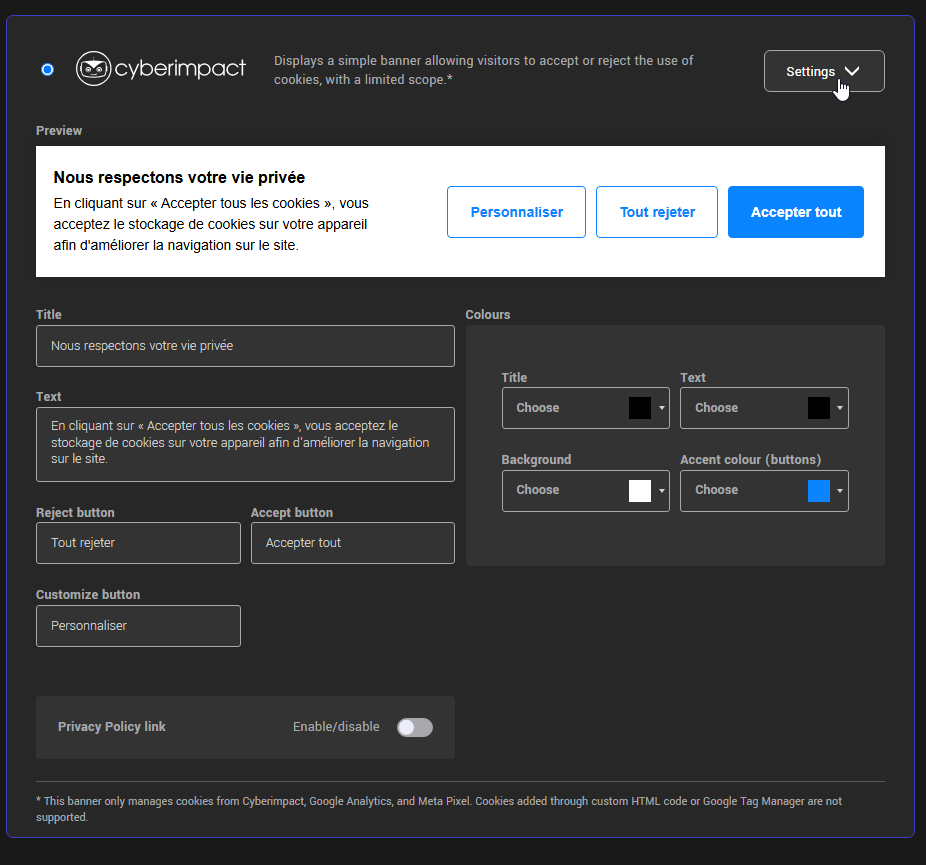
- Edit the text, buttons, and colors as needed to match your page’s visual identity.
- Don’t forget to save your changes.
You can preview the page using the temporary link or the preview option to verify how it appears.
You can also add a link to your privacy policy by enabling the dedicated switch and entering the URL and link name, which defaults to “View our privacy policy.”
A banner via Google Tag Manager (GTM)
If you want to use another consent banner provider (CMP) than the ones offered, or if you want to standardize consent management across multiple websites or platforms (for example, the one already implemented on your website), it is often possible to integrate it directly using Google Tag Manager.
Tip: Refer to your CMP’s documentation for instructions on how to integrate it via Google Tag Manager, then follow the steps provided by your provider to add it to your page.
To configure a CMP with your landing page:
- Create an account on the consent management platform of your choice.
- Add your site using the URL of your landing page.
-
Follow the detailed steps in your CMP’s official documentation for integration with Google Tag Manager.
-
If you use Google Analytics, make sure to enable the options that properly handle consent before triggering any tags (e.g., GCM support or equivalent).
-
Once your tracking tags are configured in GTM (Google Analytics, Meta Pixel, Intercom, etc.) and the GTM container is embedded on the page, verify the detection and management of cookies according to your CMP settings.
-
In GTM, retrieve the container code (e.g., GTM-XXXX) and add it to the Google Tag Manager field in your landing page settings.
-
In the page configuration, disable the privacy banner to avoid duplicates.
-
If Google Analytics or the Meta Pixel are used, it is recommended to integrate them via GTM rather than directly in Cyberimpact. This allows better control over when these scripts are triggered based on user consent.
Specific steps to configure Google Analytics in GTM:
- In Google Tag manager open the container used on your landing page.
- In the Workspace tab, go to the Tags section and add a new tag.
- In the tag configuration, select Google Analytics, then Google Tag.
- Enter the Google Analytics Tag ID to use (starting with G-*).
- For the trigger, select All Pages, then click Save.
- Click Submit in the upper right corner to publish the changes.
This configuration allows you to manage consent in a centralized and compliant manner, while maintaining precise control over when your tracking scripts are triggered.
Learn more about integrating Google Tag Manager with your landing pages >
Which banner should you choose?
To help you decide, here’s a summary of the three options:
- Axeptio banner: Best suited if you use multiple tracking services and want centralized, multi-service consent management. It offers a ready-to-use, customizable template and allows you to connect an existing Axeptio account to manage your texts, styles, and cookies.
Axeptio provides a free plan exclusively for Cyberimpact clients who have never used Axeptio before.
This offer includes up to 10,000 views per month. The promo code, valid for 24 months, also gives a 30% discount on the first paid subscription. Ideal for more complex pages or websites, offering greater control over consent management. - Cyberimpact banner: Ideal if you’re looking for a simple solution directly integrated into the platform. It manages Cyberimpact’s essential cookies, such as those related to page statistics, as well as Google Analytics and Meta Pixel cookies added through the editor.
The banner does not cover cookies from third-party applications or external scripts embedded via an HTML block or Google Tag Manager (GTM). It offers basic customization options (text, buttons, colors, and link to your privacy policy) and requires no external setup.
- Banner via Google Tag Manager (GTM): Recommended if you want to use your current consent management platform (CMP) or integrate a new one via Google Tag Manager (GTM). This option allows you to centralize consent management for all your third-party scripts (Google Analytics, Meta Pixel, LinkedIn Ads, etc.) and precisely control when they are triggered based on visitors’ choices.
It requires setting up a CMP compatible with GTM, but offers great flexibility for more complex or multi-site pages.