
In this article:
You will find below the instructions for creating a Zap in 3 steps that will allow you to add contacts to your Cyberimpact account from your favourite application.
Before you begin
It is important to check the following information before starting your zap.
- Determine if this is the right way to proceed for your needs.
Adding contacts without sending an opt-in request allows you to add an email address directly to your account without it being validated. This method is not recommended in all situations. It may be suitable if you want to synchronize a CRM or add contacts who have made an online purchase, for example. But, if you would rather link an external subscription form to your Cyberimpact account, we recommend that you follow our instructions for adding contact with an opt-in request. Therefore, this method is the only one that can update existing contact information.
- Create a Zapier account
To create a Zapier account go to https://zapier.com and follow the instructions to create your account. Choose the plan that allows you to create a zap in 3 steps.
Step 1: Zap Trigger Setup
Step 1 is to determine which event and plateform will trigger your Zap.
Please note:
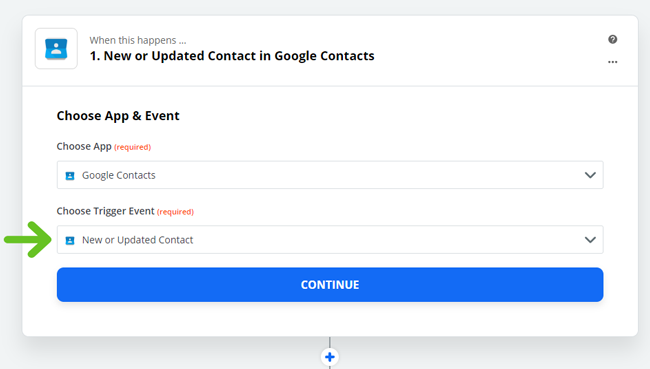
- Some of the following steps may differ depending on the event and platform selected as the trigger for your zap. For this example, we chose to use the Google Contacts app.
- The word member refers to a contact in Cyberimpact.
- Log in to your Zapier account.
- Click on "+" in the top left corner to create your Zap.
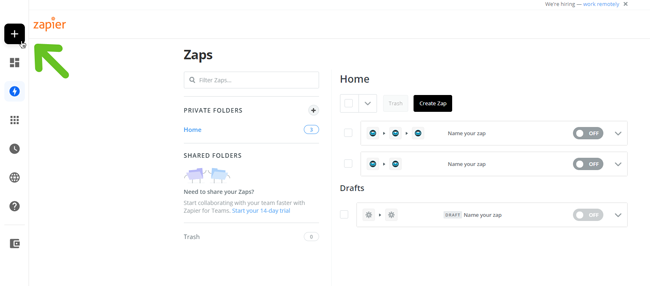
- At the top left, enter a name for your Zap (in the "Name your Zap" field). This name will only be visible to you.
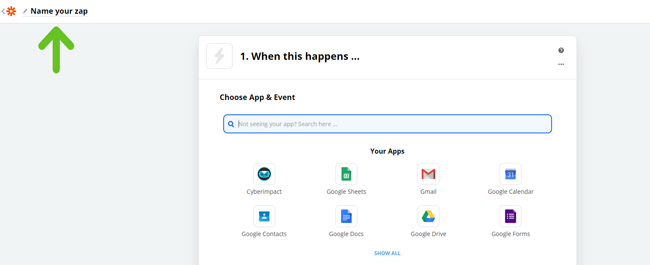
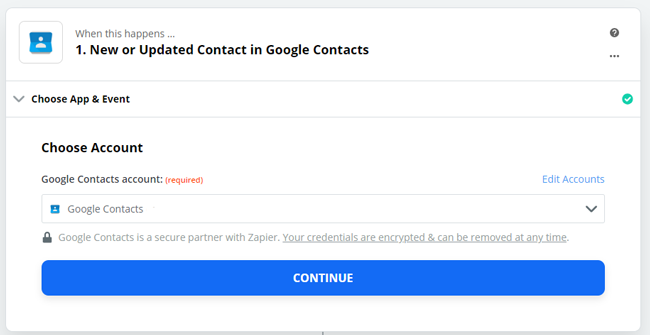
- In step 1 "When this happens...", choose the application that will trigger the Zap. For example, the application where your contacts will come from such as a form application, an online accounting service, a CRM or your social networks. Click in the search field and write the name of the application if it's not in the "Your Apps" list and then click on it to select it.
- In "Choose Trigger Events", select the appropriate trigger from the list. Trigger choices may vary from one application to another. Then click on "Continue".
- Now you have to choose the account linked to the platform chosen as a trigger and to which you want to connect, this will allow you to test the first part of your Zap. If the account is not already linked to Zapier, a new window will open to allow the connection. Follow the steps indicated. Then click "Continue".
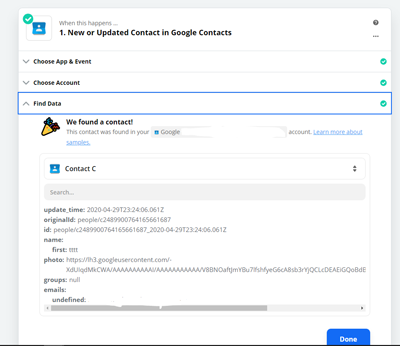
- Follow the instructions on the screen to complete and test the first part of your Zap, click "Test & Continue". Once the test is successful, Zapier takes you directly to the second step of your Zap.
.png)
- Click "Done" to continue.
Step 2: Configuring the first Zap action
The first action of the Zap is to search for the contact's address from the trigger and create it if it doesn't exist in your Cyberimpact account.
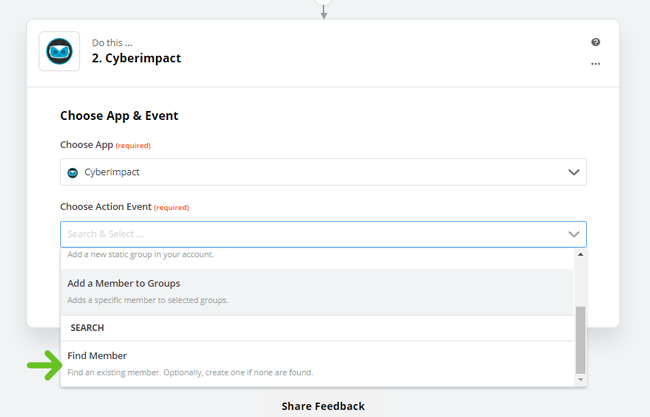
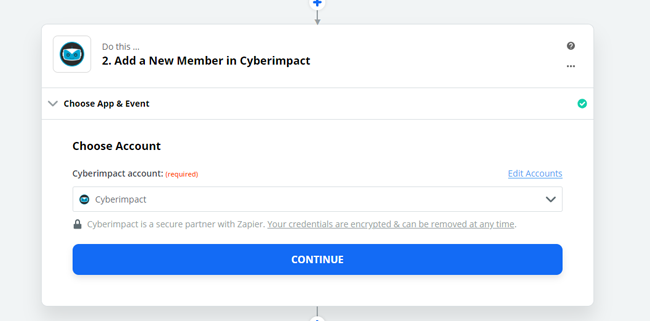
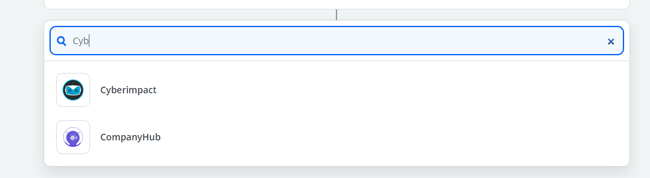
- Now you have to choose the Cyberimpact application and add it to your Zap. In step "2. Do this...", click in the search field and write the name of the "Cyberimpact" application if it's not in the "Your Apps" list and then click on it to select it.

- In the "Choose Action Event" section, choose the "Find member" action. Then click on "Continue".
- Go to your Cyberimpact account to create and copy the API token. Click here to find out how.
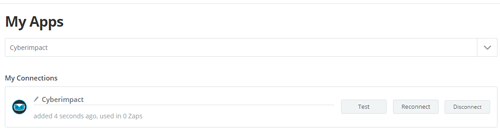
- Back in Zapier, you need to connect your Cyberimpact account.
If your Cyberimpact account is already linked to Zapier, simply click in the "Search & Select..." field and choose your account:

If this is the first time, click "Edit Accounts".
- A new window will open and you will have to write "Cyberimpact" in the "Connect a new account..." field. Click on the application image to select it.

- A pop-up window will open, this is where you will have to put the API token:
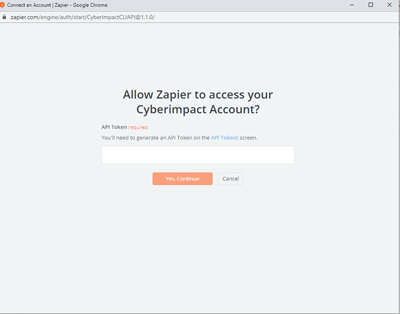
- Click "Yes, Continue". Then, when you are back on this page, you can close this window and go back to the one where we find our 2 steps.
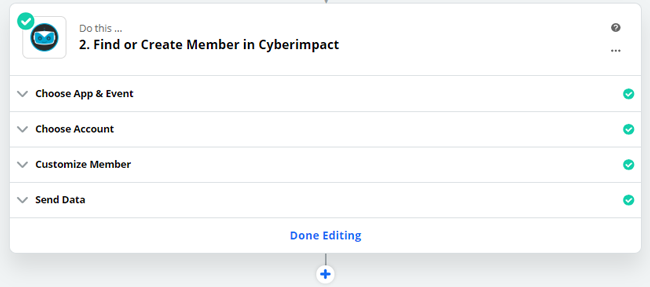
- Back on the page where our second step is (see image below), click on "Continue".
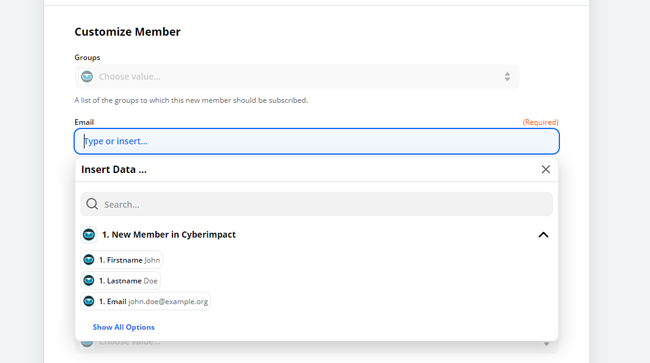
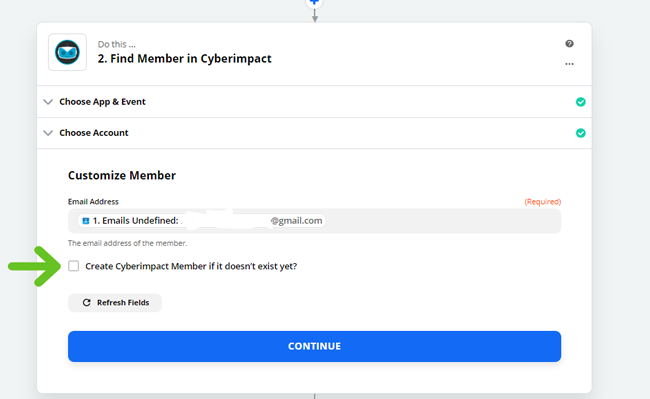
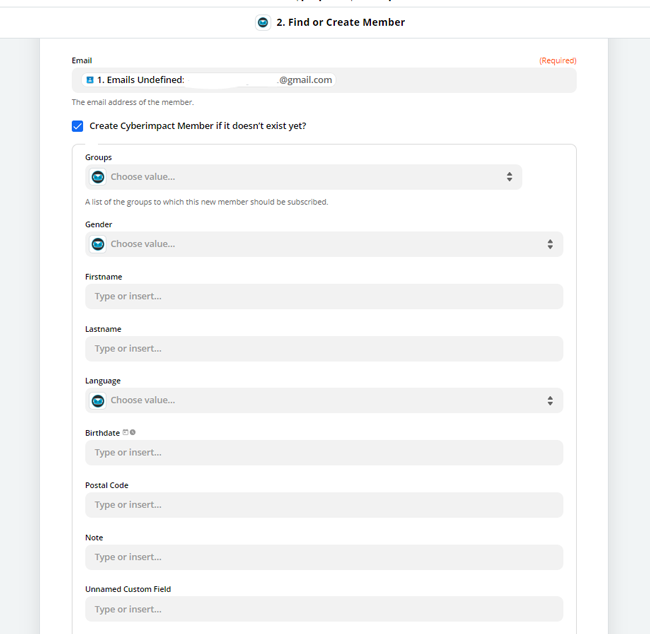
- You are now at the step of choosing what you wish to add as information in the contact's file of your new contact: "Customize Member". Under "Email Address (required)", click in the "Type or insert..." field to select from the information generated by your trigger the one that matches the email address of your contacts.
- Check the "Create Cyberimpact Member if it doesn't exist yet?" option. This ensures that the contact will be created if it didn't already exist in your account.
- (Optional step) Associate, if necessary, other fields (other than email) found in the Cyberimpact contact's details with information generated by your trigger application. For example, if your triggering application is a form and you capture the first name of the contact when subscribing, you could associate our "Firstname" field with the field in your form that matches this data.
To do so, click in the "Type or insert..." field to select from the information generated by your trigger each of the data you wish to link to Cyberimpact fields. Click on "Show All Options" if necessary to see all available data.
- Once all the fields have been chosen and associated, click on "Continue".
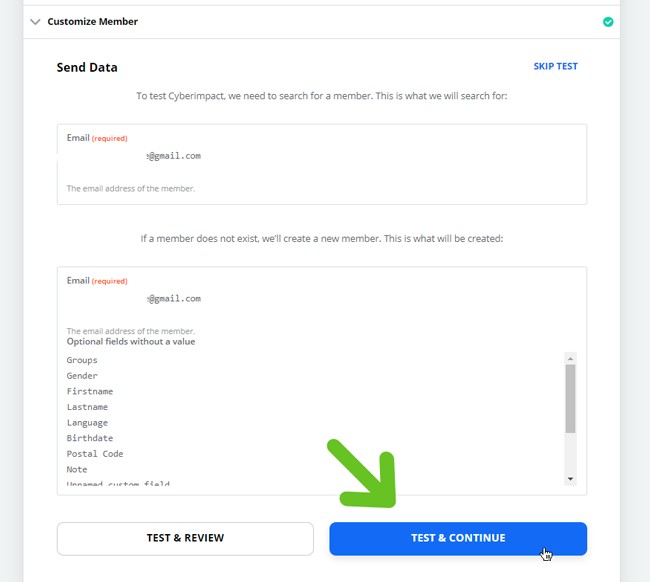
- In the "Send Data" section, you can test the configuration of this step. Zapier will use test data from your trigger application. Click "Test & Continue".
- Click "Done Editing".
Step 3: Configuring the second Zap action
The second action of the Zap consists of adding the contact found or created in the previous step to a group in your Cyberimpact account.
- Click the blue "+" to add a step.
.jpg)
You should see this page:
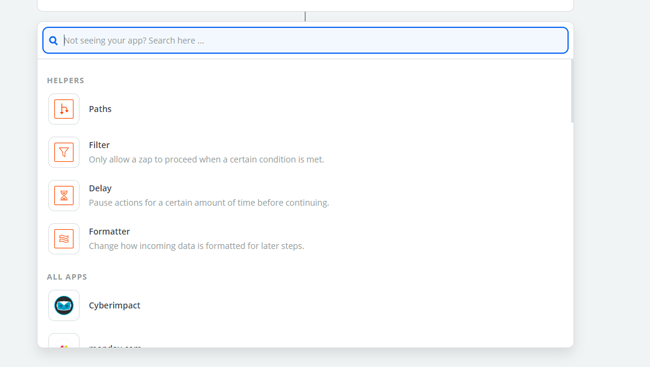
- In the search field, type "Cyberimpact" and select the icon or click the Cyberimpact icon in the "All APPS" section further down the page.
- In the "Choose Action Events" section, choose "Add a member to groups", then click "Continue".
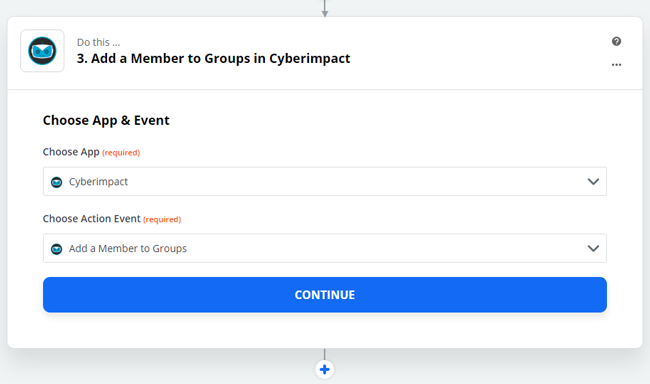
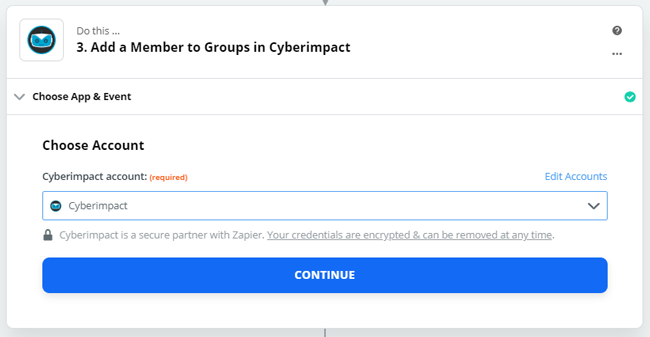
- Select the same Cyberimpact account as the one chosen in step 2 . Then click on "Continue".
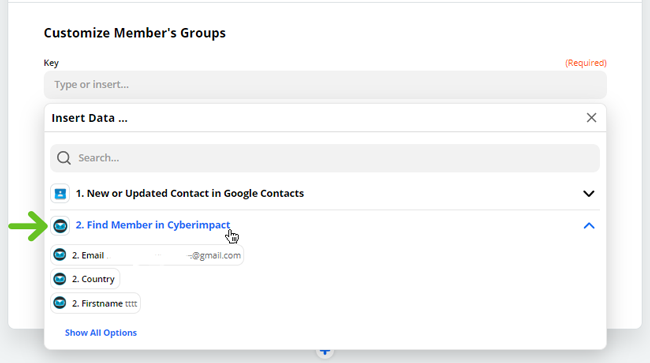
- In the "Customize Member's Groups" section, under the "Key" title, click in the "Type or insert..." field, then click on "Find Member in Cyberiimpact" and select "Email".
- In the "Groups" section, click in the "Choose value" field, the groups created in your Cyberimpact account will be displayed and you can select from the list the group to which you wish to add your contact.
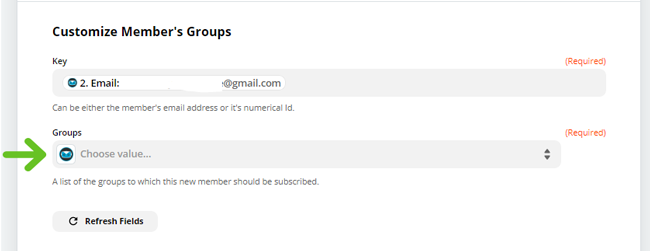
- Then, click "Continue".
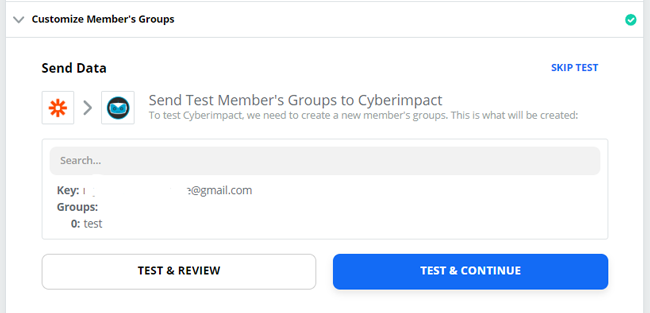
- After this step, click "Test & Continue" to test step 3 of your Zap.
- Click on "Done Editing".
- Activate your Zap by clicking on the switch to go from "OFF" to "ON".

- Then log into your Cyberimpact account to check whether Zapier's "test" contact has been added to the selected group(s). You can then delete this contact.
- Don't forget to test your Zap again using the application that triggers it!
.png)